

Device MDM Providers
Adding your device MDM provider in Kolide is a key part of requiring MDM enrollment for devices.
Prerequisites
Android
The device must have a Work Profile connected to your organization’s MDM provider, or be a fully managed company device.
When using a Work Profile, the Kolide app must be installed and opened from the Work Profile.
iOS
No additional requirements.
Setup for Kolide mobile app
There are 3 steps to set up an MDM provider with Kolide.
-
Add your provider in the Kolide admin settings
- This will generate a key used in later steps.
Use your MDM provider to create a configuration for the Kolide app containing the secret key.
Distribute Kolide via your MDM provider, which delivers the configuration along with the app.
Adding an MDM Provider
To add your MDM provider and obtain the secret, follow these steps:
Click your user avatar in the upper-right corner of the Kolide UI.
In the dropdown menu, click Settings
In the menu on the left, click Device MDM Providers.
Click Set Up New Provider.

In the modal that appears, add a name for the MDM and (optionally) the Enrollment URL. The name and url help admins differentiate between multiple providers in the settings UI and are not shown to users.
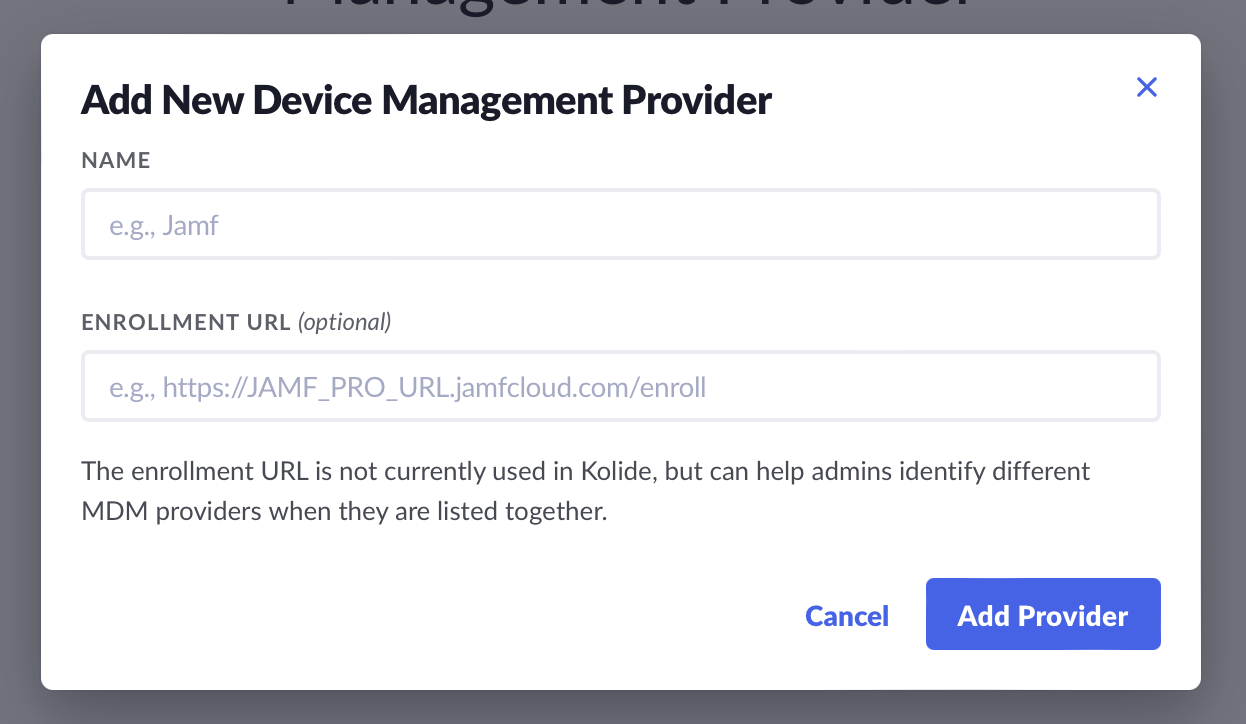
Press Add Provider.
Save the secret key in the modal that appears in a password manager like 1Password.
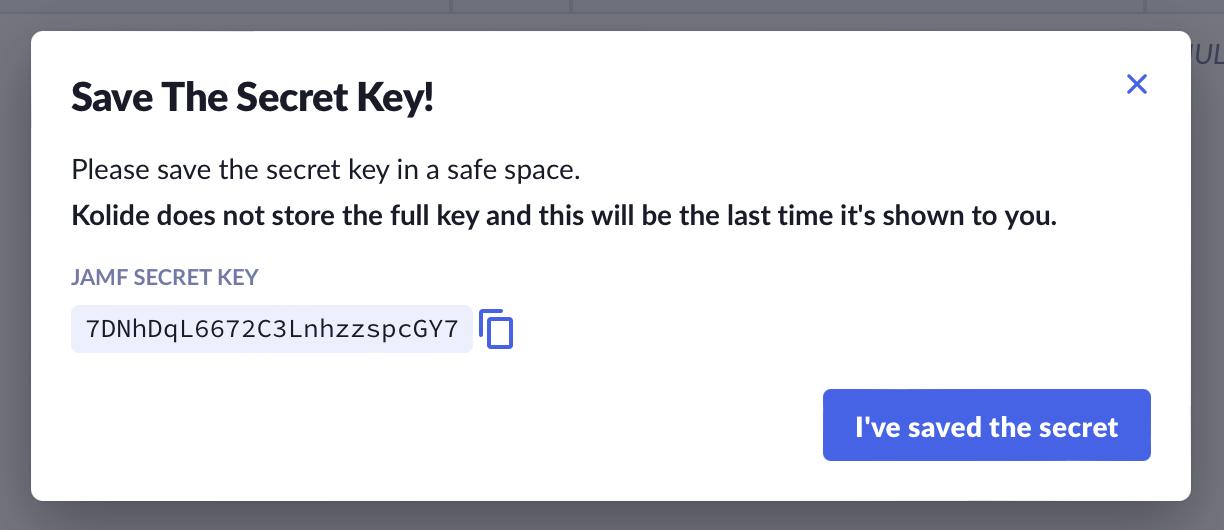 Warning:This is the only time you are shown the full key. If you lose your key, you must repeat the process from the beginning to generate a new key.
Create a Configuration in your MDM settings
Depending on your MDM provider, the method to create and deliver a configuration for a mobile app will differ.
Instructions by provider:
We’d also love if you’d send us the documentation page for your provider so we can add it here.
Jamf Pro
Click the Devices tab on the Jamf Pro dashboard.
Click Mobile Device Apps and then click + New in the upper-right corner.
Select App Store app or apps purchased in volume and click Next.
Search for Kolide and then click Add next to the Kolide app.
On the General tab of the resulting New Mobile Device App page, select the Convert unmanaged app to managed option. Leave the remaining settings alone, and then click Save.
Click the Scope tab, and click Edit. Define the users or groups that you want to deploy to, and then click Save.
-
Select the App Configuration tab. Copy the following code and paste it into Jamf Pro. Update the information with your secret key:
<dict>
  <key>managementSecret</key>
  <string>your_secret_key_from_kolide_settings</string>
</dict>
Kandji
When entering the AppConfig, paste the following, updating with your own secret key.
<dict>
  <key>managementSecret</key>
  <string>your_secret_key_from_kolide_settings</string>
</dict>
Google Workspace Admin
Both iOS and Android apps can be managed through Google Workspace Admin. You must configure each platform’s app separately. You can use the same secret key for both(recommended).
Android
Follow the instructions in this Google support article
When creating a Managed Configuration, you should see a form with a single field called “Management Secret”. Paste your secret key into this field and continue with the instructions.
iOS
Follow the instructions in this Google support article
The AppConfig dictionary is the following, updating with your own secret key.
<dict>
  <key>managementSecret</key>
  <string>your_secret_key_from_kolide_settings</string>
</dict>
Generic instructions
There are generally two steps to configuring an app:
- Adding the app as a “managed” app
- Customizing settings for the managed app, including its configuration.
Adding the app
In your MDM dashboard, you should find the list of apps managed in your MDM. When you add a new app to this list, you should be given a setting where you can enter the configuration (next step).
If you cannot find this list, try searching your provider’s documentation.
When searching your provider’s support documentation, the following keywords will be helpful:
- managed configuration
- managed app
- appconfig
- app config
Setting the configuration values
Once you have the app managed, you need to find the setting for managed configurations. It might be called something a little different, but it should have the work “configuration” in the name.
The format for iOS and Android settings differ slightly.
For iOS, the format is an XML file with keys and values in a dictionary. There might be references to “AppConfig”, which is the official name for this format.
There will be a text field that you can enter your configuration into. The content of the field will be the following, updating with your secret key.
<dict>
  <key>managementSecret</key>
  <string>your_secret_key_from_kolide_settings</string>
</dict>
For Android, the MDM provider should load the available app settings from a file the developer publishes to the Google Play Store along with the app.
In Kolide’s case, this means you should see a form with a single field called “Management Secret”. Paste your secret key into this field and save.
Distributing Kolide
At this point, you can use your provider to force-install Kolide on managed devices, or instruct users to install it via your managed app store.
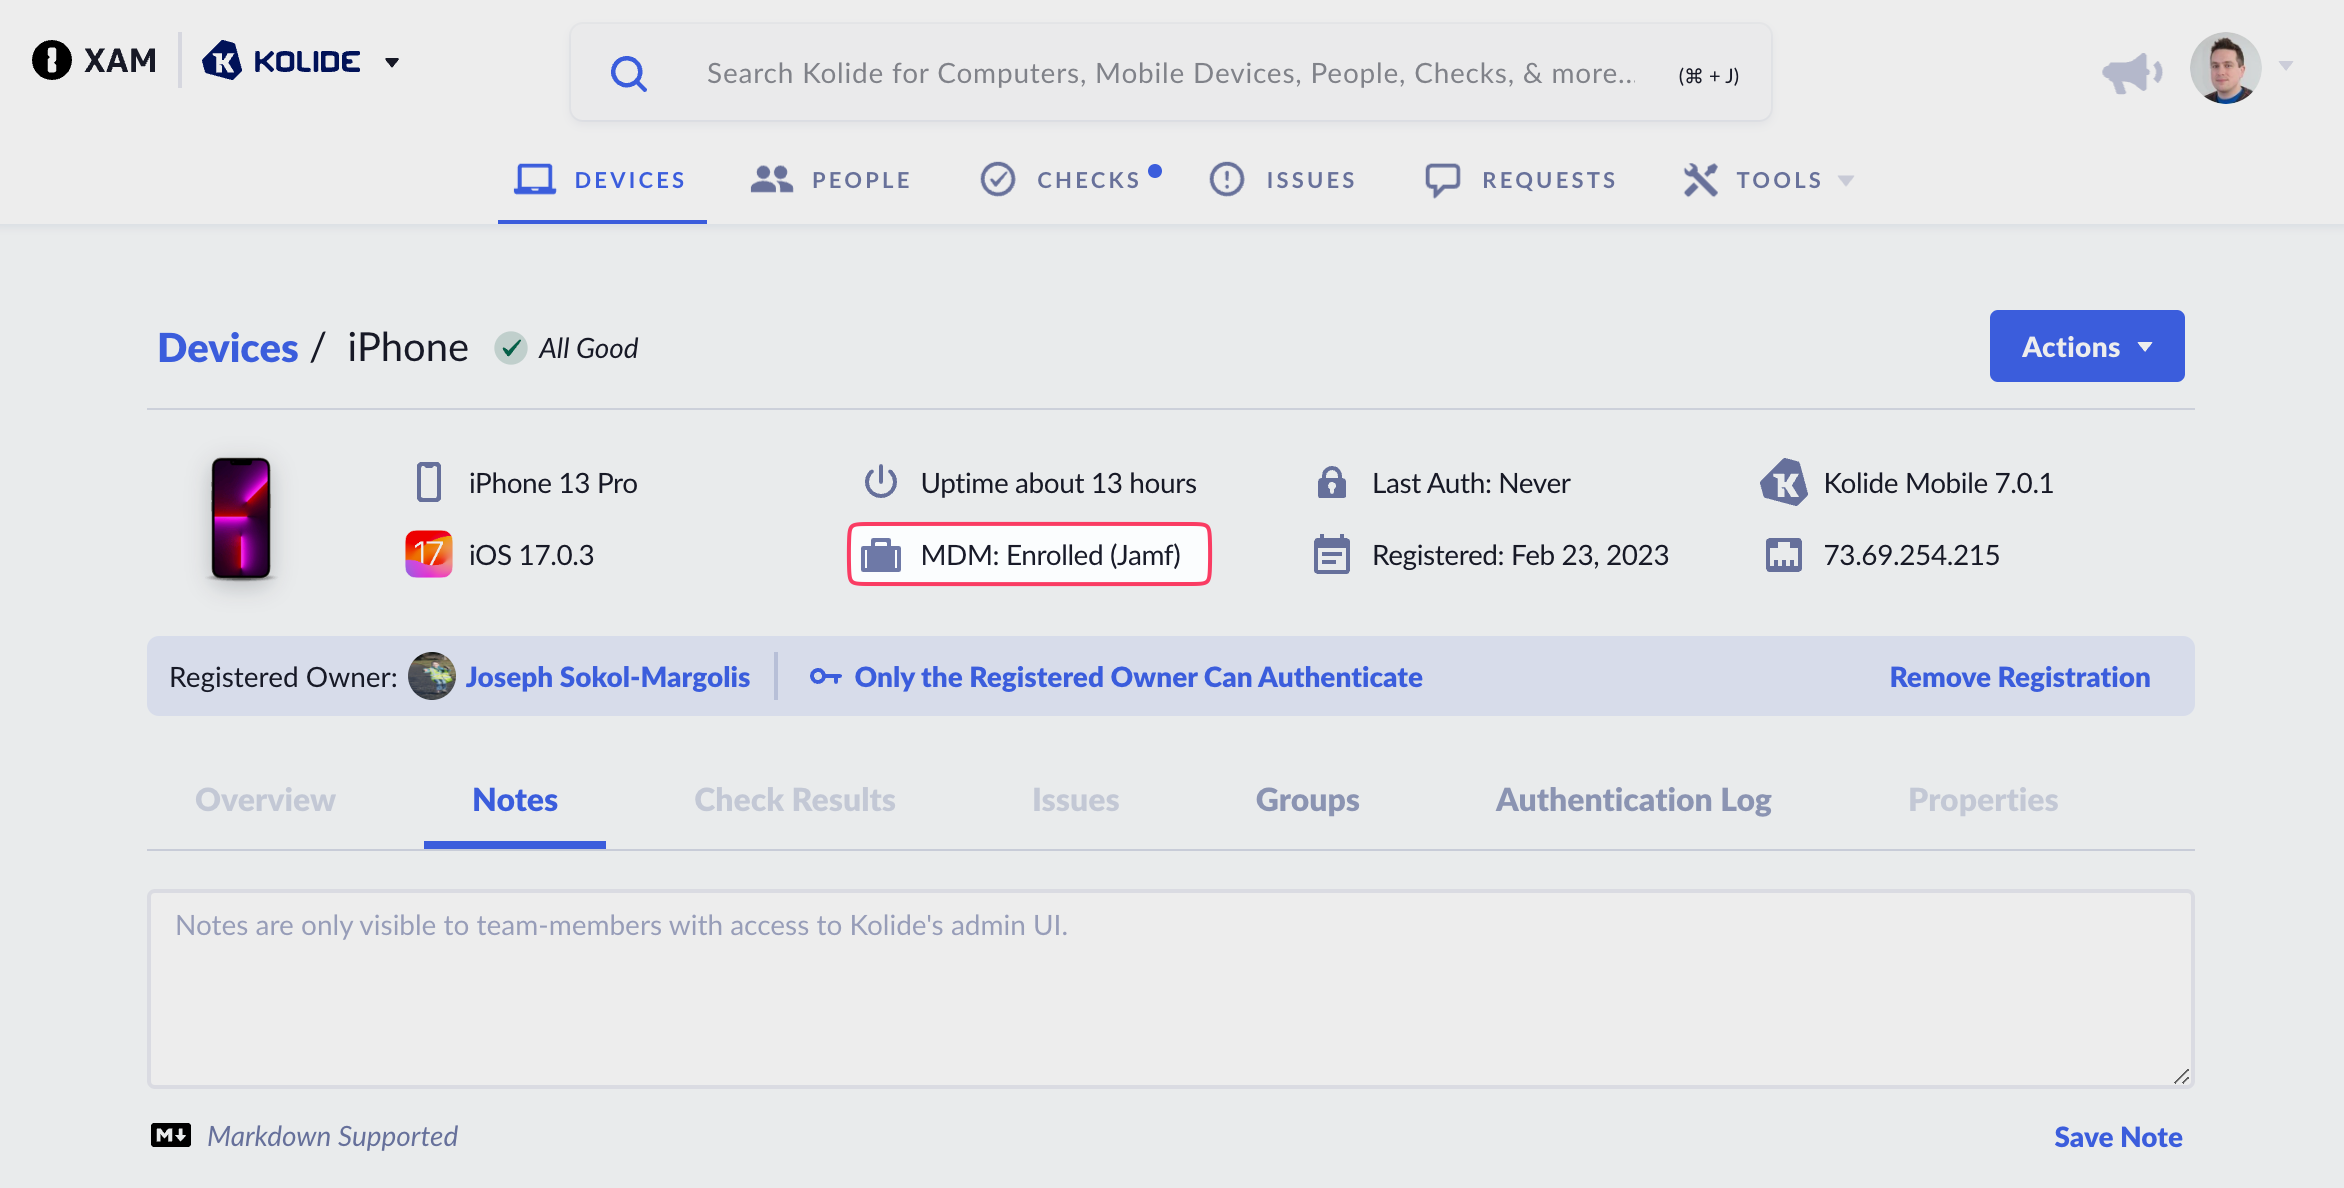
To verify your setup, you can use Kolide to log in to any protected resource on your mobile device. Once you finish authentication successfully, you can navigate to the device details page, which should appear similar to the below image:
Troubleshooting
The best way to debug is to use the Check Mobile OS - Ensure Device Is Enrolled in Organization MDM
Enable this check so that it applies to the device you are troubleshooting with. You can leave the check set to “Reporting Only” mode so it does not interfere with other users while you are testing.
Open your Kolide mobile app and press the “recheck device” button to ensure check data is transmitted.
Open the Check issues for the MDM check and click on the table row for your device.
You should see Issue Details which includes a table of the properties relevant to the check
managementSecret is (NULL)
This means your configuration setting was not delivered to the device or could not be accessed by the Kolide app during check data collection.
Ensure the device is enrolled in the correct MDM
In addition to ensuring the device is enrolled in an MDM program, double-check that the account is for the MDM provider you just configured.
Ensure roles, groups, and profiles apply to the device
Make sure any roles, groups, or profiles created in your MDM provider include the device and that the configuration you created applies to those devices.
Android - ensure Kolide is installed from the Managed Play Store
In your app drawer, Kolide should appear under your “Work” tab and not your “Personal” tab. When installing, tap the Play Store icon from the “Work” tab to ensure the store opens with the correct account enabled.
managementSecret has a value, but the check failed
The issue is likely a typo when you entered the secret key. You should restart the process by generating a new key in the Kolide Admin Settings